Step 1
What we thought about our art:
"It was fun because we learned all the steps to get to the shading"
"Little bits, like the shading were hard to do"
"The eye was difficult to do because it was hard to get it like Mr Braddock's one. Maybe it was because he was using a hard and thinner crayon than we were"
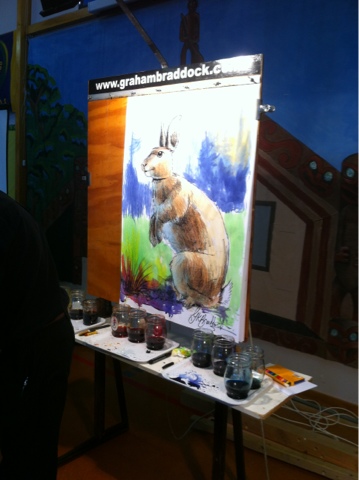
"We liked it when he dyed the rabbit at the end and added the finishing touches"
"The dye made the rabbit stand out"


We used our maths skills to check and measure how the object is going to fit on the page. Our page is split into thirds. We decided how far away parts of the body were from the edge of the page.
First work out the start and the finish lines eg. where the head and body will be. Then work out the big shapes e.g. the body. After that work out the smaller shapes e.g. feet.
Step 2
Every new thing gets measured off what you have already done eg. we checked the width of the ear against measurement that we already had for the eye from the top of the page.
We got to stand up and share what we had done so far and make any changes.
Step 3
Now we changed from pencil to crayon to do fine detail and shading. We looked for the dark things first. Check for things like the sparkle in the eye.
This part was quite tricky because our crayons were fat.
Step 4
Add yellowish dye to colour the rabbits body with sunshine. Add a browny blue to the shady parts of its body. Use blue for the shady side
What we thought about our art:
"It was fun because we learned all the steps to get to the shading"
"Little bits, like the shading were hard to do"
"The eye was difficult to do because it was hard to get it like Mr Braddock's one. Maybe it was because he was using a hard and thinner crayon than we were"
"We liked it when he dyed the rabbit at the end and added the finishing touches"
"The dye made the rabbit stand out"


I like it. Especially my one!
ReplyDelete